 Skip to content


The Best Temporary Storage Solutions During Your Annual Fridge Defrost

Maintaining a medical refrigerator requires a yearly manual defrost to prevent ice build-up from hindering temperature uniformity. Many healthcare providers delay this vital maintenance because moving sensitive inventory feels risky and difficult. The fear of accidental spoilage or breaking the cold chain often leads to procrastination, which eventually damages the cooling system’s efficiency and shortens the life of the appliance.
Proper planning protects your biological assets from the "Danger Zone." According to Health Canada guidelines, most refrigerated products must stay between 2°C and 8°C. If temperatures rise above this range, bacteria and chemical degradation occur rapidly. This guide provides a clear path to manage your inventory safely during the 4 to 24 hours required for a full defrost cycle, ensuring your medical cold storage backup remains intact and compliant.
The Golden Rule: The "Purge and Plan" Phase
Preparation is the most important part of any refrigerated inventory management task. Before you unplug the unit, you must know exactly what is inside and where it will go. This phase reduces the time the fridge door stays open and prevents confusion during the move.
-
Audit Current Stock Levels
Review every item in the unit and check expiry dates. Dispose of any expired or damaged products according to provincial waste protocols. By thinning out the inventory, you reduce the amount of temporary laboratory cooling space required. This ensures that only viable, high-value items take up limited backup space during the maintenance period.
-
Pre-Chill Your Backup Containers
Never place sensitive vaccines or samples into a warm container. Set up your secondary storage units at least 24 hours before the defrost begins. Use a calibrated data logger to confirm the backup environment is stable. Starting with a cold interior prevents the initial temperature spike that happens when warm air is trapped inside.
-
Organize by Temperature Sensitivity
Group items based on how quickly they degrade when exposed to ambient air. Place the most stable items near the top and the most sensitive ones at the bottom of your portable medical coolers. Label each group clearly. This organization allows for a faster transfer, limiting the time products spend outside of a controlled environment.
-
Notify All Relevant Personnel
Communicate the defrost schedule to every staff member in the clinic or lab. Post a sign on the fridge door stating it is out of service for cleaning. This prevents people from accidentally placing new shipments into a unit that is warming up or trying to access items that have already been moved.
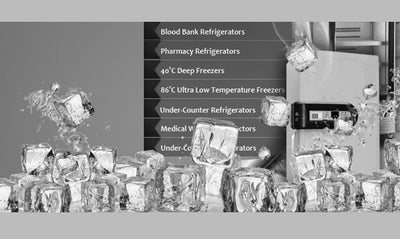
Top-Tier Storage Solutions

Choosing the right temporary vaccine storage equipment is a matter of safety and legal compliance. Not all coolers provide the stability needed for medical-grade products. You must use tools that can hold a steady temperature for the entire duration of the defrost process without fluctuating.
-
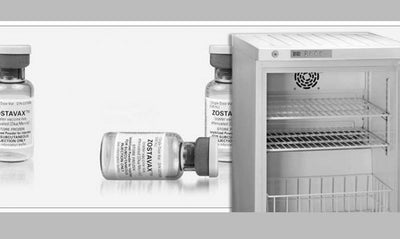
Active Portable Medical Fridges
These units plug into a wall outlet or a vehicle’s power port to provide continuous cooling. Unlike passive boxes, they use a compressor or thermoelectric system to keep the air at a precise set point. They are the best choice for a medical fridge maintenance plan involving high-value biologics that cannot risk any warmth.
-
High-Performance Insulated Shippers
Medical-grade passive shippers use thick vacuum-insulated panels to keep heat out. When paired with conditioned phase change materials, these containers can maintain the required 2°C to 8°C range for several days. They are reliable because they do not rely on electricity, making them safe during unexpected power flickers or long defrosts.
-
On-Site Secondary Medical Refrigerators
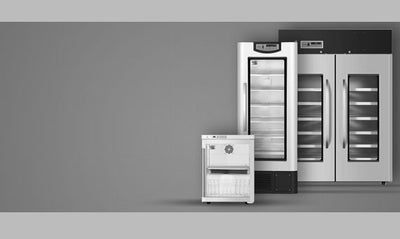
The safest option is moving items into a second, permanently installed medical unit. If your facility has multiple fridges, stagger their defrost dates so one is always available for overflow. This healthcare refrigeration strategy offers the most stability and uses existing monitoring systems to track the safety of the moved stock.
Maximizing Your Temporary Setup
Once you move the inventory, you must monitor it closely. A temporary setup is more vulnerable to outside room temperatures than a permanent fridge. Using the right cold chain equipment monitoring tools and techniques will prevent a total loss if the temporary cooling fails during the night.
-
Use Calibrated Data Loggers
Place a digital data logger with a buffered probe inside your temporary container. This device records the temperature every few minutes and triggers an alarm if the air gets too warm. It provides the "chain of custody" proof required by Canadian health inspectors to show the products remained safe throughout the move.
-
Optimize Thermal Mass
Fill empty gaps in your cooler with chilled water bottles or extra gel packs. These items act as a "cold battery" that slows down temperature changes. A full cooler stays cold much longer than a half-empty one because there is less room for warm air to enter when the lid opens.
-
Minimize Lid Openings
Treat the temporary storage like a vault. Every time you open the lid, cold air falls out and warm air rushes in. Only open the container if it is absolutely necessary to retrieve a specific item. Keeping the seal tight is the easiest way to maintain stable vaccine temperatures without extra power.
Transitioning Back: The "Move-In" Process

Moving items back is not as simple as just plugging the fridge in and loading it up. The unit must reach a state of equilibrium first. This post-defrost medical fridge setup requires patience to ensure the internal climate is safe enough for your most sensitive professional assets.
-
Verify Stable Temperature Benchmarks
After the ice is gone and the fridge is dry, plug it in and let it run empty. Wait until the thermometer shows a steady 5°C for at least two to four hours. This proves the thermostat is working correctly and the air is cold enough to receive the inventory without causing a heat spike.
-
Check for Interior Moisture
Use a clean, lint-free cloth to dry every corner of the fridge. Any remaining water can turn into ice quickly or encourage the growth of mould. Ensuring the unit is bone-dry before restocking is a vital part of medical equipment hygiene and prevents the immediate return of frost on the coils.
-
Restock Using High-Airflow Patterns
Place items back into the fridge while leaving space between boxes. Proper air circulation is needed to keep the temperature even across all shelves. Avoid crowding the back wall or the cooling vents, as this can lead to "cold spots" that might freeze your products, causing permanent damage to the proteins.
Defrosting your medical fridge is a mandatory task that protects both your equipment and your patients. By using high-quality temporary clinical storage and following a strict plan, you remove the danger of product loss. It is much cheaper to spend time on a careful move than it is to replace a ruined shipment of vaccines. Following these steps ensures your facility stays compliant with the highest standards of Canadian healthcare.
Maintaining a reliable cold chain requires the right tools and professional support. If you need a more permanent solution or want to upgrade your current equipment to avoid frequent frost issues, expert help is available. For high-quality medical refrigeration and expert advice on maintaining your fleet, contact 360 Medical Degree at 1-800-209-2082.


Leave a comment